This post mainly includes all of my Research, Drawings, Concept art and Mood Boards. Below is a detailed explanation of all the different pictures and notes shown on my Mood Board.  Below that is my storyboard.

Mood board Top

Mood board Bottom

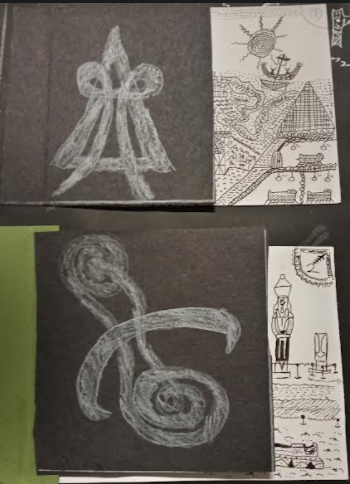
Mood board left side closed

Mood board left side opened

When making my mood board, I had decided to use some of my past work from my secondary and college years that I thought would fit in well with this topic I was studying. I had a big book of trees at home, most of them were illustrated and for those that weren't I made up my own designs. The monkey puzzle tree for example,  is a tree that I have always loved the idea of, a tree that makes whoever climbs it take another path as it tricks the user into temptation and regret for not reaching the fruit at the top. I drew this tree in my own art style and added colour and pasted in facts nearby for a newspaper culture article.
If you are wondering what the black and white images represent, they are black fine liner drawings I had done as part of my final project in art one time. I had researched structures in Egyptian culture and then drew them out in my own layout design. The plate shaped piece below was actually intended to be done over the rim of a bowl. I had used some of my own for the final piece and it is done so the viewer can look round clockwise/anticlockwise and still follow a path through Egyptian history.

Mood board Middle

Mood board right side + extra

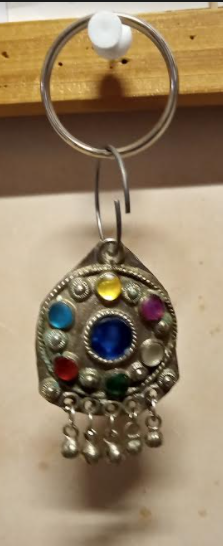
Salvaged Amulet/Diadem I found

possible video of me unfolding my mood board

Full picture of transformed Mood board with all panels shown

Storyboard

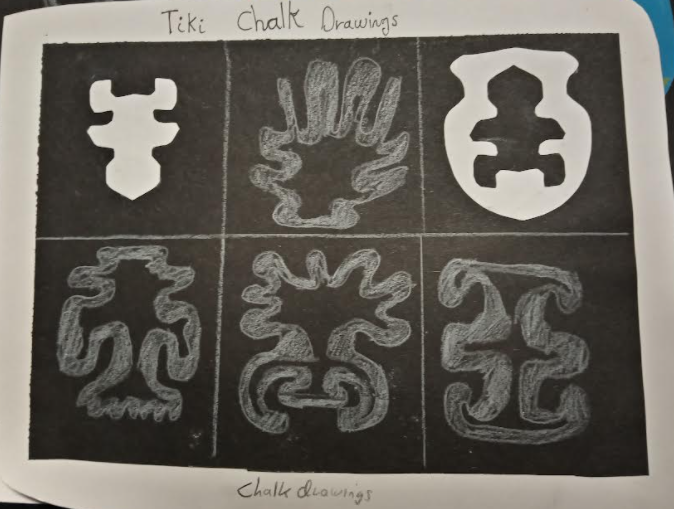
Testing out oil Pastels

Storyboard with 9 individual landscapes and different use of materials.

This storyboard above may just be a sheet of 9 pictures but I personally count the one below as well as I made it afterwards. When I was creating the different miniature scenes on the storyboard, I decided to make two with colour.  I had plenty of oil pastels and paint at home, water and normal versions and used it to decorate the most simple but effective scenes. 
The two with colour on them are the "Valley landscape" and the "Egyptian civilization" scenes. The valley was the most simple out of the two but when I used the pastels it looked way nicer than I could have ever imagined. There is a sheet above which showcases my experimentation of the colours I had. I tested which yellows were best for sand and sandy structures, which blue was best for water and even found one for clouds. As well as which green is best for grass, a darker green I later discovered I found best for moss or a man-made pathway. 
The Egyptian picture however used paint and I even included some of the pastel colours to create a border between some drawings. For example the river dividing the pyramids and the market I had to use a fine liner, because the paint used mixed together and it needed some Tippex in some cases.

Example of 2D and 3D level Map breakdown

This picture above is a bigger and more explained version of my original level design that I first made when I came up with the original idea. I have talked about this more in the video below but basically before I made anything in Maya or unity I made up this rough concept with simple shapes that I knew I could design in a short amount of time. Obviously this would not look as nice as my designs today but it had easy to learn mechanics and environments.
Upload the 3 environment thumbnails to your blog and describe how the images conveys the idea / mood/ story / themes e.t.c. using your research and the resources from the previous lesson on Concept Art.

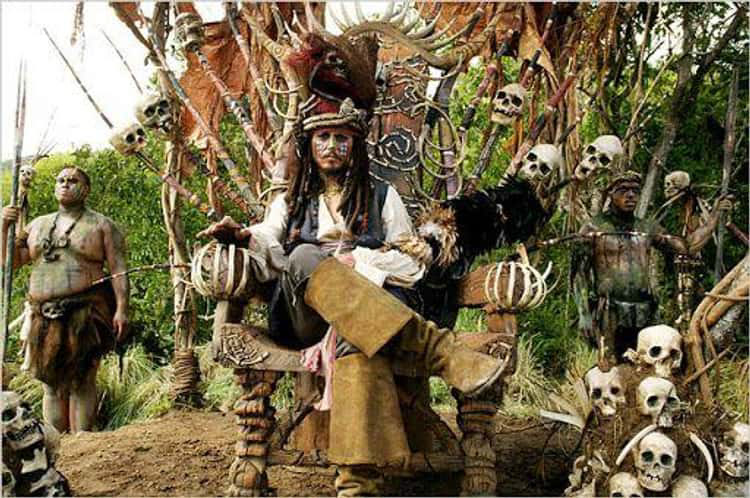
An image from Pirates of the Caribbean: Dead Man's chest.

An example of what some of the bridge I want to make going across the hills

When originally creating the tribal environments for my game, I had remembered the scenes from the second Pirates and the Caribbean film. Literally in the first few scenes of the movie, Jack was trying to escape a tribal village. I used two pictures from the film above to convey my ideas going forth to potentially create a bridge dividing two tribal towns and a big enough area for a throne that Minie would reside in. 

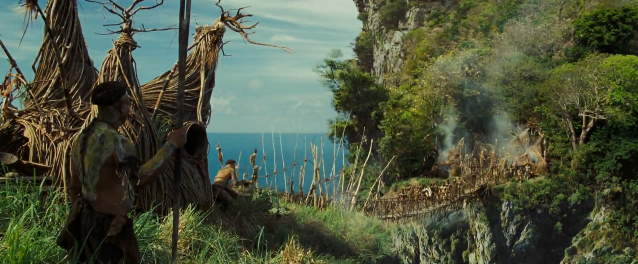
A range of physical and artificial mountains used in the second Pirates of the Caribbean film

This picture above was a good piece of landscape from the film, for which I used to draw over my own design down below. Originally I wanted to have this mountain layout to have several bridges and small huts to explore and loot. But during design process, this got limited to just a start and an end point over spikes.
The intended path to follow on the digital thumbnail drawing (2d or 3d) would be to climb the mountain, take the left bridge up to the Tiki town. Then the player would heal up and either go further up or take the risky path down below. 
The bridge leading further up the mountain would lead the player to the cave level but if they chose to go further down from the town, it would test not only their skill but their agility as well. The path would be torn and rugged, filled with gaps and spikes laying around. The bridges ropes looked as if they were about to snap and birds may swoop as you cross to potentially knock you off the bridge and send you back to the beginning. 
Once they reach the end of this optional route, the player would find a run-down and derelict village, one left behind and crumbling to its demise by the cause of pillages and earthquakes over time. In the Tiki leaders house, the player would scavenge for health and food only to discover a gem to fit their collectors wheel and a key to the cave entrance.  
The player would feel satisfaction and relief that they made it all this way and feeling overjoyed that the journey was worth it. Knowing the route back, they would wander back to town and shower their glory to the villagers

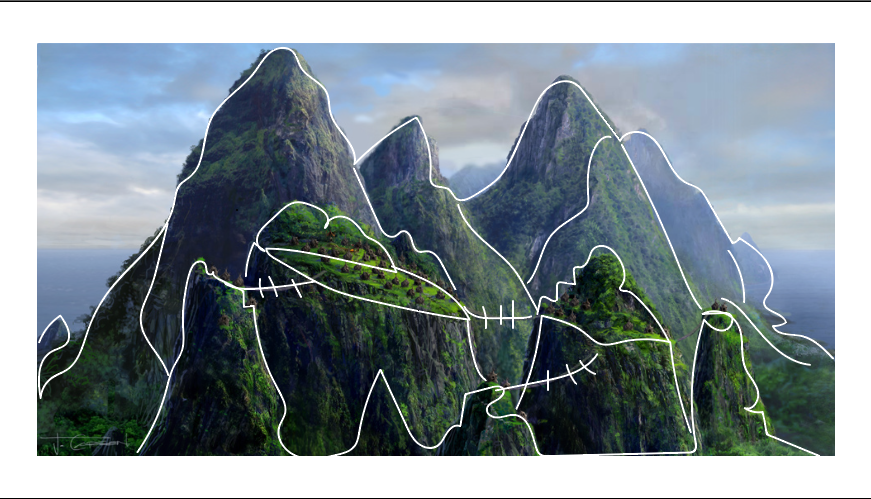
Outline drawn over mountain range landscape with bridges attached.

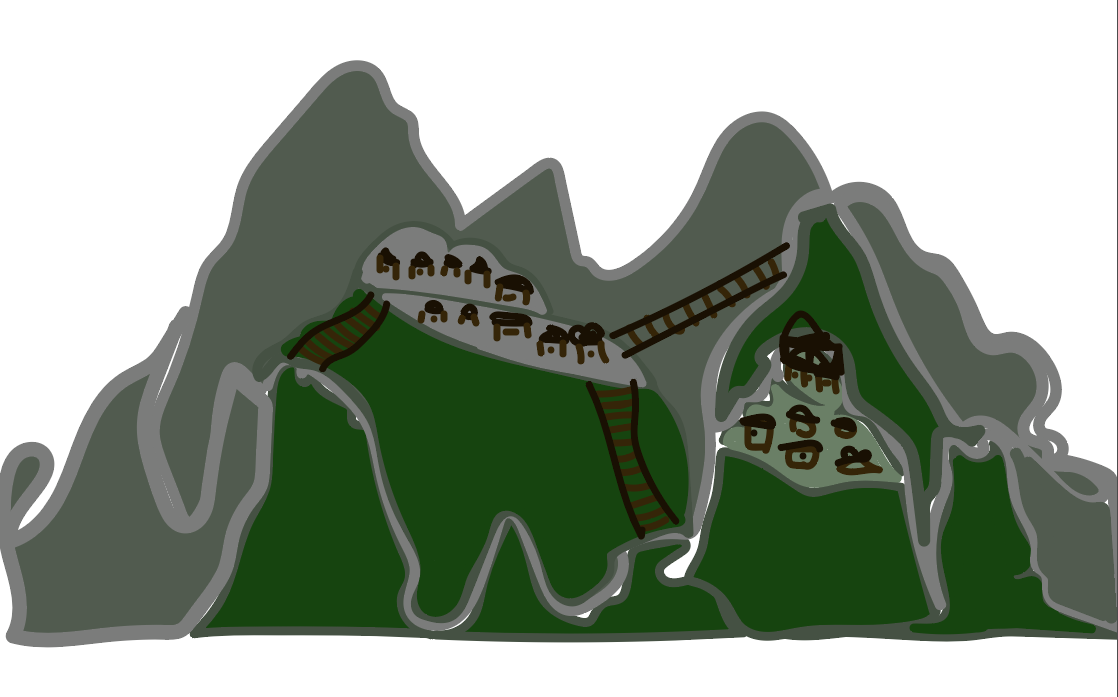
A recent and simple digital thumbnail of the Tiki mountain crossover level.

 I haven't really spoken about emotion or mood or even many themes that the art images are making the viewer feel or the player feel when they play. That would be because most of them don't really have any imminent threat to them. You as the player would just explore and relax in every environment you encounter. However when I was thinking up about the mountain Tiki town landscape, I knew that eventually my ideas would change over time and when I was doing the digital thumbnail, I just had to make the player for once in the game if not at all feel every emotion at once. 
I had indeed made many different versions of a bridge level and my main inspiration were the levels in the first Crash Bandicoot game. (as seen below). I had seen many gameplayers struggle at keeping their temper when playing and it was fun to learn what other people think and play like. 
 So when drawing up the thumbnail, I made sure that there was only one path to take, only one route to the goal. But as you may see from the drawing, there is a path from the village that leads down the mountain, perhaps towards a collectable or a trophy/powerup the player might need for the story.  
I had intended for the player to feel anxious over which way to go, so that if they went the wrong way they'd have to double back. Maybe if they were struggling, (like in the first pic below) the player might think outside the box and approach the bridge in a more safe mood and gain the confidence needed to get to the other side.

A picture of someone "cheating" the jumps in the Crash Bandicoot 1 bridge level.

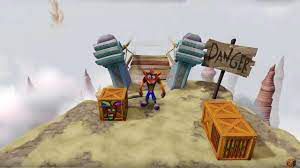
A picture of the start of the bridge level in Crash Bandicoot 1 which shows a ominous path a head and a danger sign.

Since this picture did not get into the final design, my thumbnail will be post creation of my final level. It will be created to just show my initial thoughts and ideas. But as you can see from the early image above, there are many crossed lines going across dips in the mountains and these would be connecting bridges. These bridge would make the player jump across loose floorboards and gaps every once in a while. This was obviously inspired by the Crash Bandicoot levels in the first game. Two of which are considered to be hard amongst new players but by learning the pattern, these levels aren't so difficult. 

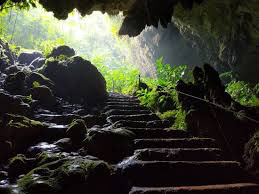
My ideal entryway to cave level

Another cave picture I could've used

When coming up for ideas on a cave level, I had originally been watching clips from the Mummy and scorpion king films, these helped quite a lot as I remember watching them from a very young age and really wanting to delve deep into Egyptian research and facts/figures. I went and collected some Egyptian artefacts from a friend of my parents who was an archaeologist. She gave me the bookmarks which were made out of papyrus and I used them for my mood board.  I also looked into the Indiana jones films for which I got some of these inspired cave from. 

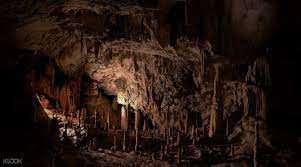
Original cave image with no outline

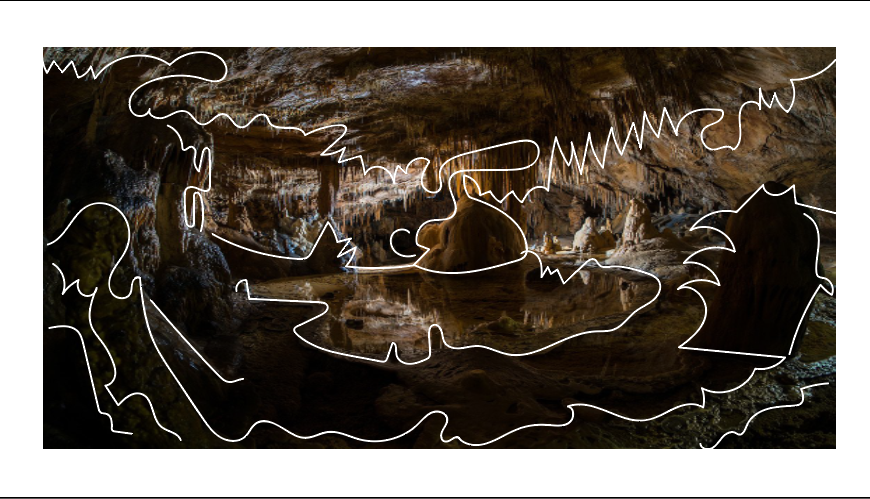
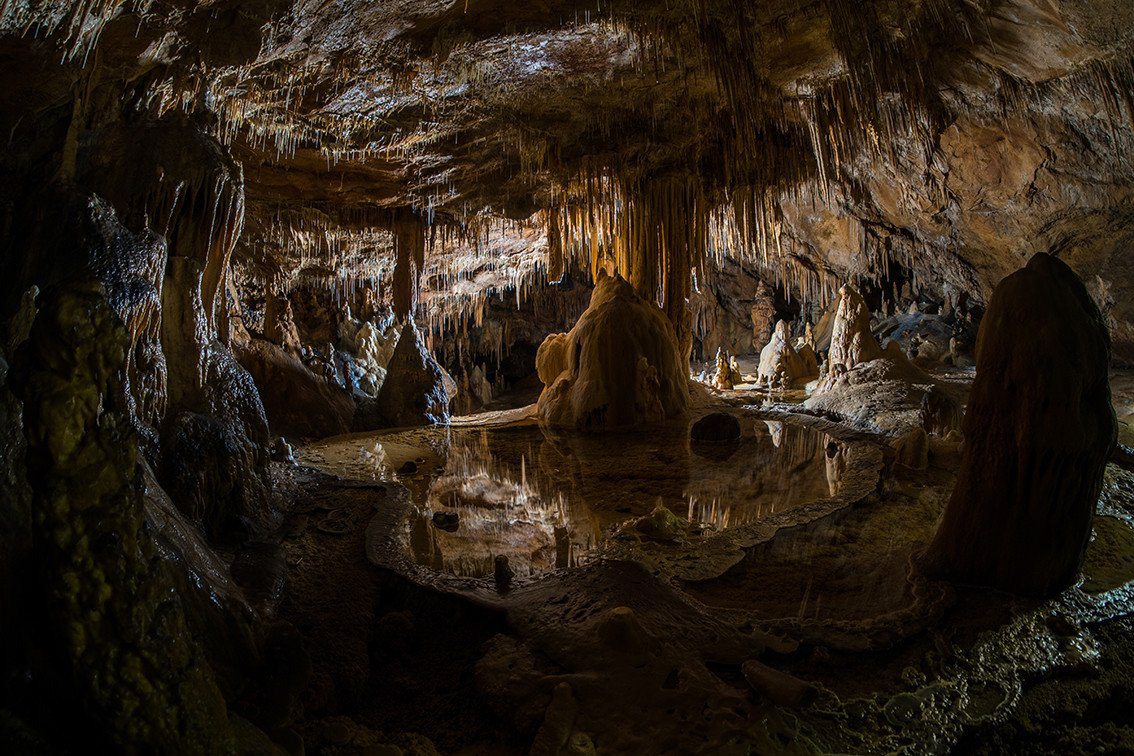
My ideal outline of cave interior picture

These pictures above showcase some ideas and pictures for what I was originally going to have for an underground level at the time. This level would've had the player traverse through a cave after going across the dangerous bridge section seeking shelter. Only for the player to find a cave filled with stalagmites and stalactites and poisons acid on the floor. (This acid was already included in the 3d game kit so it would be easy to implement). 
The picture down below showcases my final outline over the cave interior I picked. It has some spikes above and below and platforms which are locked in a position from which a previous explorer had tried and failed to fix to get across.  There is also an odd looking rock formation to the far right which if approached the wrong way, the player could slip into the acid or they could climb up the rock that had water erosion on it and exit the cave. 

Finished Digital Thumbnail: Mountain cave area

Back to Top